Easy Speed: How to Upgrade Your RAM
Ultimate Guide: How to Upgrade Your RAM for a Lightning-Fast PC Experience
Picture this: You fire up your web browser, open ten tabs for work, and switch to a video edit. Suddenly, everything freezes. Your PC fan spins like crazy, and progress bars crawl. That drag? It’s often low RAM at work.
Random Access Memory, or RAM, acts as your computer’s short-term memory. It holds data apps need right now for quick access. Without enough, your system swaps info to slower storage, causing stutters. Upgrading RAM is the easiest fix. It’s plug-and-play, meaning no fancy tools or tech skills required. You can boost performance in under an hour. This guide walks you through why it matters and how to do it right.
Why More RAM Translates to Better Performance
Identifying the RAM Bottleneck
Low RAM chokes your PC when tasks pile up. More capacity means faster handling of multiple programs. Your system stays responsive, even under heavy loads like streaming and browsing at once.
Think of RAM as fuel for your processor. Without it, the engine sputters. Studies show that doubling RAM can cut load times by up to 50% in demanding apps.
Recognizing Symptoms of Insufficient Memory
Spot the signs early to avoid frustration. Apps might crash without warning. Or your hard drive light blinks non-stop—that’s swapping, where the system uses storage as fake RAM.
Multitasking feels like wading through mud. Browser tabs load slow. Even simple tasks, like opening files, take forever. If these hit, check your RAM use in Task Manager—over 90% full signals a bottleneck.
RAM vs. Storage: Understanding the Difference
RAM vanishes when you shut down—it’s volatile. Storage like SSDs or HDDs keeps files safe forever. RAM speeds things up; storage holds the long-term stuff.
Imagine RAM as your desk for current work. Storage is the warehouse for everything else. A cluttered desk slows you; more space lets you work fast. Upgrading RAM clears that clutter without touching your files.
Performance Gains for Specific Use Cases
Gamers see huge wins with extra RAM. Frame rates climb higher, and levels load quicker. No more dips during intense battles.
Video editors scrub timelines smoothly. Renders finish faster too. For heavy browsing, say goodbye to tab freezes—handle 20+ without a hitch.
Assessing Your Current System Specifications
Determining Compatibility Before You Buy
Jumping straight to purchase can waste money. Match new RAM to your setup first. Wrong type? It won’t work or could harm your board.
Tools make this simple. Free software shows your specs in seconds. Save time and cash by checking ahead.
Identifying Motherboard Limitations (Capacity and Slots)
Your motherboard sets the rules. It caps total RAM, often at 32GB or 64GB. Slots vary—two, four, or more.
Grab your manual or download CPU-Z. It lists max capacity and open slots. Task Manager works too: Right-click the taskbar, pick Task Manager, then Performance tab. See installed RAM there.
Note slot count. If full, remove old sticks. Aim for pairs for best speed.
Understanding RAM Types: DDR Generations and Speed
DDR3, DDR4, DDR5—each generation fits specific boards. DDR4 rules most modern PCs; DDR5 is new for high-end. Mix them? No go—your system ignores the odd one.
Speed matters, measured in MHz like 3200 or 3600. Higher numbers mean quicker data pulls. CAS Latency, or CL, shows response time—lower is better, like CL16 over CL18.
Buy matching sticks. For example, if your board takes DDR4-3200, get that exact spec.
Checking Current Module Status and Configuration
See what’s inside now. CPU-Z details stick sizes, speeds, and setup. Single-channel runs one path; dual uses two for double bandwidth.
Installed 8GB? You might have two 4GB sticks. For upgrade, add matching ones in empty slots. Quad-channel is rare but boosts even more on supported boards.
Run the tool, note details, then shop smart.
The Plug-and-Play Upgrade Process: Step-by-Step Installation
Preparing for a Safe and Successful RAM Swap
RAM swaps are beginner-friendly. No soldering or screws in tight spots. Just careful handling keeps it smooth.
Expect 15-30 minutes total. Have a static-free spot ready. Tools? Your hands mostly, plus a screwdriver for the case.
Essential Pre-Installation Safety Checks
Static zaps kill components. Touch a grounded metal part, like your case frame, to discharge. Work on a wood table, not carpet.
Unplug the power cord. Hold the power button five seconds to drain leftover juice. Open the side panel—usually thumbscrews or latches.
Wear an anti-static wristband if you have one. It clips to the case ground. Better safe than sorry.
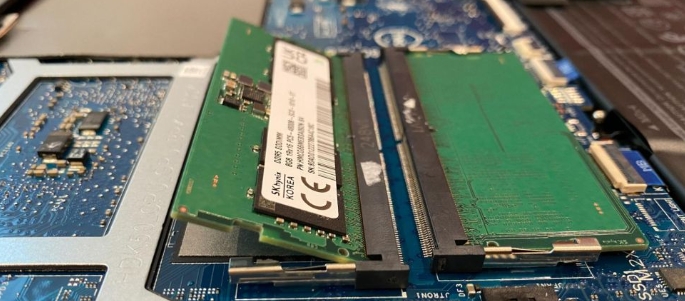
Locating and Removing Old Modules
Slots sit near the CPU, long and black. Clips guard each end. Press them out gently.
Pull the stick straight up by edges. Never touch gold contacts or chips—they’re fragile. Set old RAM aside safely.
If slots are full, repeat for each. Label sticks if mixing later.
Installing New RAM for Optimal Dual-Channel Performance
Align the notch on the stick with the slot key. Push evenly until clips snap in. It takes firm pressure—about 30 degrees angle first, then straight down.
For dual-channel, use color-matched slots. Often A2 and B2, per manual. Two sticks? One per channel. Four? Fill pairs first.
Power on. Fans should spin normal. If not, reseat the RAM.
Post-Installation Verification and Optimization
Ensuring the System Recognizes the New Memory
Boot up and check right away. Most times, it just works. But verify to catch issues early.
BIOS is your first stop. It shows raw hardware view, no OS bias.
Verifying Capacity in the BIOS/UEFI
Restart and tap Delete or F2 for BIOS—key varies by board. Look for memory section. Total should match your new amount, like 16GB from 8GB.
If low, power off and reseat. Clean slots with air if dusty. Boot to OS next; Task Manager confirms again.
Enabling XMP/DOCP for Maximum Speed
New RAM often runs slow by default. XMP (Intel) or DOCP (AMD) unlocks full speed. In BIOS, find overclock or memory menu.
Select the profile—usually Profile 1. Save and exit. Your PC reboots faster now.
Warn: Rare instability? Disable and test stock speeds. Most kits run fine.
Testing Stability Under Load
Run demanding tasks first. Open all your tabs, play a game, edit a clip. Feel the difference?
Use MemTest86 for deep checks. Boot from USB, let it scan overnight. No errors? You’re golden.
Monitor temps too. Tools like HWMonitor show if anything spikes odd.
Conclusion: The Instantaneous Impact of Memory Upgrades
Upgrading RAM wipes out stutters and lag. Multitask freely, game smoother, edit without waits. It’s the quickest path to a snappier PC.
Key points stick: Check compatibility first. Install with care for dual-channel gains. Enable XMP, test stability. No tech wizardry needed—just smart steps.
Ready to boost? Grab compatible sticks today. Your PC will thank you with speed you forgot it had. Dive in and feel the rush.